前回まで/次回以降の取り組みはこちらから。
今日は前回までで作ったpythonアプリを、pyQt5で作っていきます。
pyQt5とは
pythonアプリでGUIを作るのに便利なライブラリです。
詳しくはこちら⇩
前回作ったRaspberry Pi側のソフト
前回は
- シリアル通信を受け取れるようにする
- 照度センサの値をリアルタイムに表示する
所まで作りました。できた画面はこんな感じで、
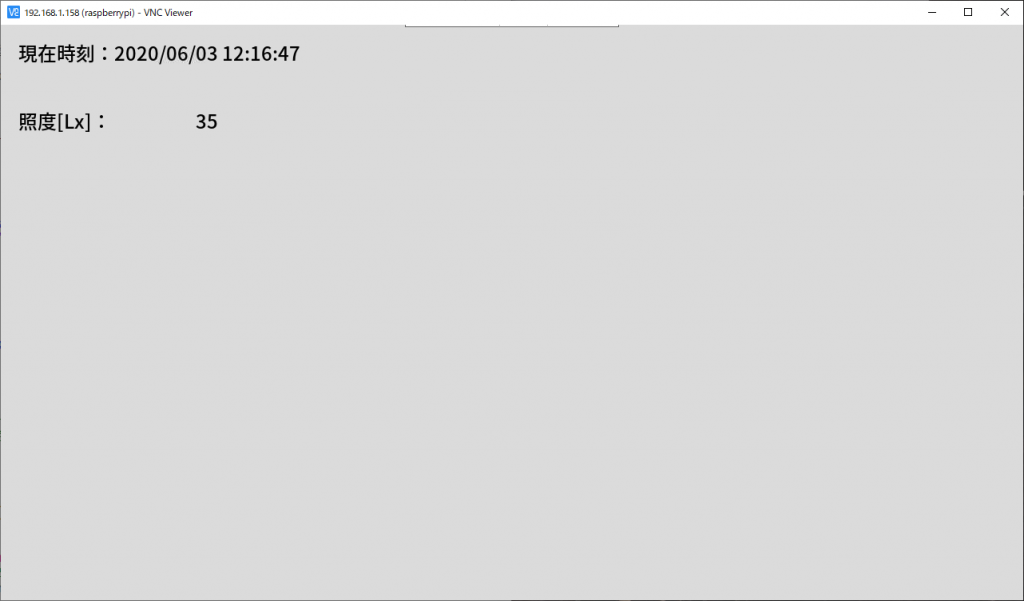
pythonのソースコードはこんな感じ。
1 2 3 4 5 6 7 8 9 10 11 12 13 14 15 16 17 18 19 20 21 22 23 24 25 26 27 28 29 30 31 32 33 34 35 36 37 38 39 40 41 42 43 44 45 46 47 48 | #coding:utf-8 # 2020.06.01 V0.0.1 画面作成、現在時刻表示 # 2020.06.02 V0.0.2シリアル通信対応、とりあえず照度データのみ表示 import tkinter as tk import datetime import serial #使用するシリアルポート(Arduino IDEなどで調べる) serialport = "/dev/ttyACM0" #シリアル通信 class SerialCom: def __init__(self): self.sc = serial.Serial(serialport,9600) def data_read(self): rc_data = self.sc.readline() return rc_data def window_refresh(): #時刻更新 now = datetime.datetime.now() label_time =tk.Label(root,text="現在時刻:",font=("Helvetica",18)) label_time.place(x=20,y=15) label_time_v =tk.Label(root,text=now.strftime('%Y/%m/%d %H:%M:%S'),font=("Helvetica",18)) label_time_v.place(x=140,y=15) #照度データ更新 bright = myserial.data_read() bright_text = str("{0:4}".format(int(bright))) label_bright=tk.Label(root,text="照度[Lx]:",font=("Helvetica",18)) label_bright.place(x=20,y=100) label_bright_v=tk.Label(root,text= bright_text ,width=5,anchor="e",font=("Helvetica",18)) label_bright_v.place(x=200,y=100) root.after(100,window_refresh) #メイン画面 root = tk.Tk() root.attributes("-fullscreen", True) root.title("あさがおIoT観察アプリ") #シリアル通信のインスタンス生成 myserial = SerialCom() window_refresh() root.mainloop() |
これをpyQt5で再現します。
pyQt5で作ったGUI
こんな感じ。
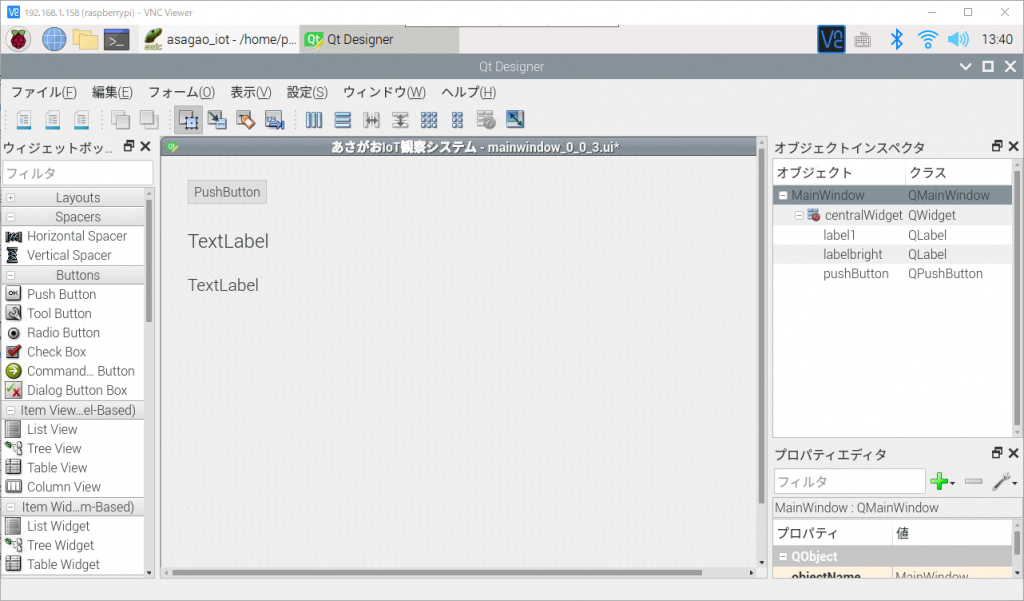
フルスクリーン表示にするとアプリを閉じれなくなるので、左上のボタンで閉じるようにしてみました。
最終的に場所は考えます。ここじゃないです(笑)
pythonプログラム
.pyファイルは全部で4つありますが、そのうち2つを編集しました。
1 2 3 4 5 6 7 8 9 10 11 12 13 14 15 16 17 18 19 20 21 22 23 24 25 26 27 28 29 30 31 32 33 34 35 36 37 38 39 40 41 | from PyQt5.QtWidgets import QApplication from ui.mainwindow_0_0_3 import MainWindow from PyQt5.QtCore import * import datetime import serial serialport = "/dev/ttyACM0" class SerialCom: def __init__(self, serialport): self.sc = serial.Serial(serialport,9600) def data_read(self): rc_data = self.sc.readline() return rc_data def refresh_window(): myserial = SerialCom(serialport) #時刻更新 now = datetime.datetime.now() ct = "現在時刻:" + now.strftime('%Y/%m/%d %H:%M:%S') ui.label1.setText(ct) #照度更新 bright = myserial.data_read() bright_text = "照度[Lx]:" + str("{0:4}".format(int(bright))) ui.labelbright.setText(bright_text) if __name__=="__main__": import sys app = QApplication(sys.argv) ui = MainWindow() ui.showFullScreen() refresh_window() timer = QTimer() timer.timeout.connect(refresh_window) timer.start(100) ui.show() sys.exit(app.exec_()) |
1 2 3 4 5 6 7 8 9 10 11 12 13 14 | # -*- coding: utf-8 -*- from PyQt5.QtCore import pyqtSlot from PyQt5.QtWidgets import QMainWindow from .Ui_mainwindow_0_0_3 import Ui_MainWindow import sys class MainWindow(QMainWindow, Ui_MainWindow): def __init__(self, parent=None): super(MainWindow, self).__init__(parent) self.setupUi(self) @pyqtSlot() def on_pushButton_clicked(self): sys.exit() |
実行するとこんな感じ。
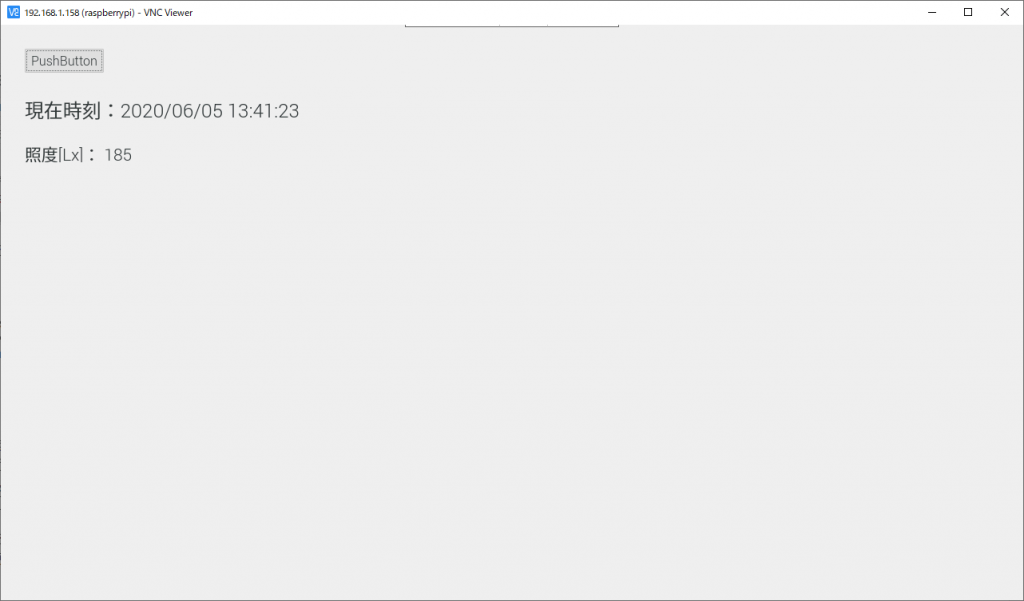
今回はひとまずArduino IDEで通信できているポートの名前を控えて、main.pyに直接書き込んで選択するようにしました。
今は照度データだけを受け取っているので、受け取ったデータをそのまま照度の数値のところに当てはめているだけです。
最終的にはいろいろなセンサの値が届くようになるので、「どのデータがどの数値か?」を判断して、正しい場所に表示していく必要がありますね。
まだまだ続きます。


コメント